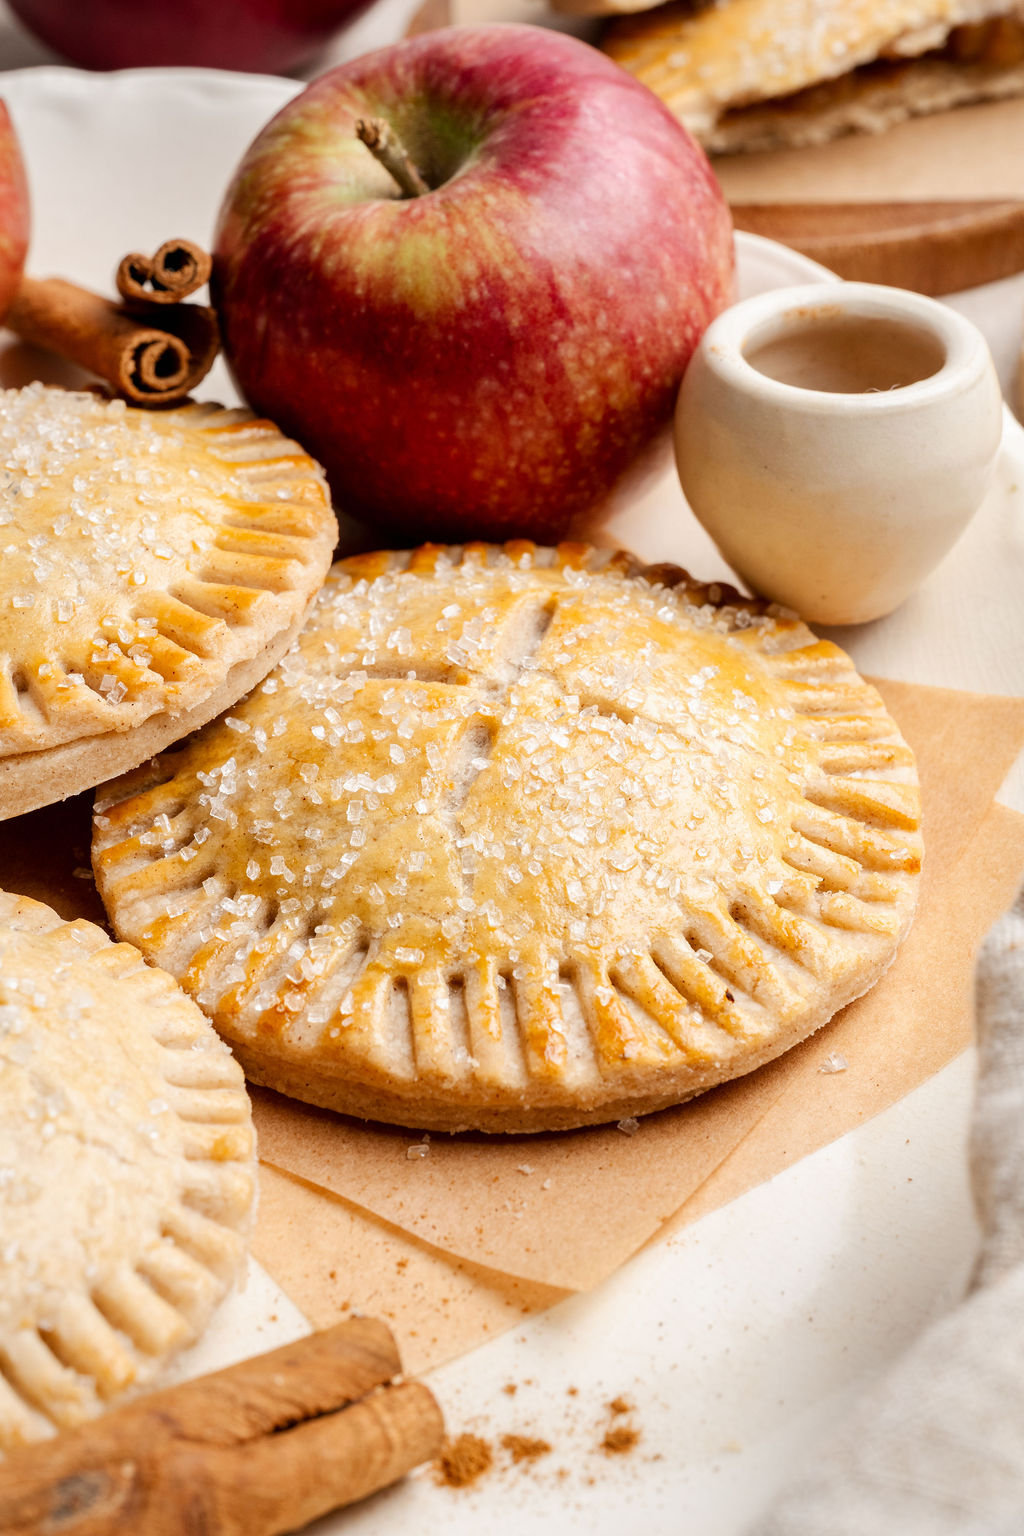


There’s something undeniably cozy about a warm, handheld pie — especially when it’s filled with soft, cinnamon-spiced apples wrapped in a tender, buttery crust. These Gluten-Free Apple Hand Pies bring together everything you love about a classic apple pie but in a charming individual size that’s perfect for snacking, gifting, or serving at holiday gatherings.
The homemade gluten-free pastry bakes up beautifully flaky, while the apple filling simmers into a jammy, perfectly spiced center. Finished with an egg wash and a sprinkle of coarse sugar for sparkle, these little pies feel both nostalgic and delightfully elevated — a treat you’ll want to make all season long.
Whether you enjoy them warm from the oven, paired with a scoop of vanilla ice cream, or packed into a lunchbox for an afternoon pick-me-up, these hand pies are a delicious reminder that gluten-free baking can be both beautiful and incredibly delicious.
Why You’ll Love This Recipe
Classic Flavor, Mini Form
Everything you love about a traditional apple pie — cinnamon, brown sugar, and warm spices — in a fun, handheld version.
Flaky Gluten-Free Pastry
The homemade pastry dough uses cold butter and a splash of apple cider vinegar to create a tender, buttery crust that rivals wheat-based pie dough.
Perfect Make-Ahead Dessert
Both the dough and the filling can be prepared in advance, making assembly easy and stress-free.
Great for Gifting or Sharing
These individual pies pack beautifully and make an adorable homemade treat for friends, neighbors, or teachers.
Ingredient Notes

Gluten-Free Flour:
This recipe uses a gluten-free 1:1 flour blend for the pastry. A high-quality blend with xanthan gum ensures the dough rolls out smoothly and bakes up tender and flaky (I love Bob’s Redmill).
Cold Butter:
Cold, cubed butter is essential for creating pockets of steam in the dough. This gives the crust its beautiful layers and crisp edges.
Ice Water + Apple Cider Vinegar:
The vinegar helps tenderize the dough and improves structure, making it easier to roll without cracking.
Apples:
Use peeled, diced apples. Dicing into ½ inch pieces ensures they soften evenly and fit neatly into the pies.
Warm Spices:
Cinnamon, allspice, and nutmeg bring classic apple-pie flavor. Feel free to add a pinch of cardamom for an elegant twist.
Cornstarch Slurry:
This thickens the apple filling so it doesn’t leak out during baking.
Egg Wash & Coarse Sugar:
Brushed on top for golden color and sparkle.
How to Make Gluten-Free Apple Hand Pies
See the recipe card below for the full ingredient list, measurements, and instructions.
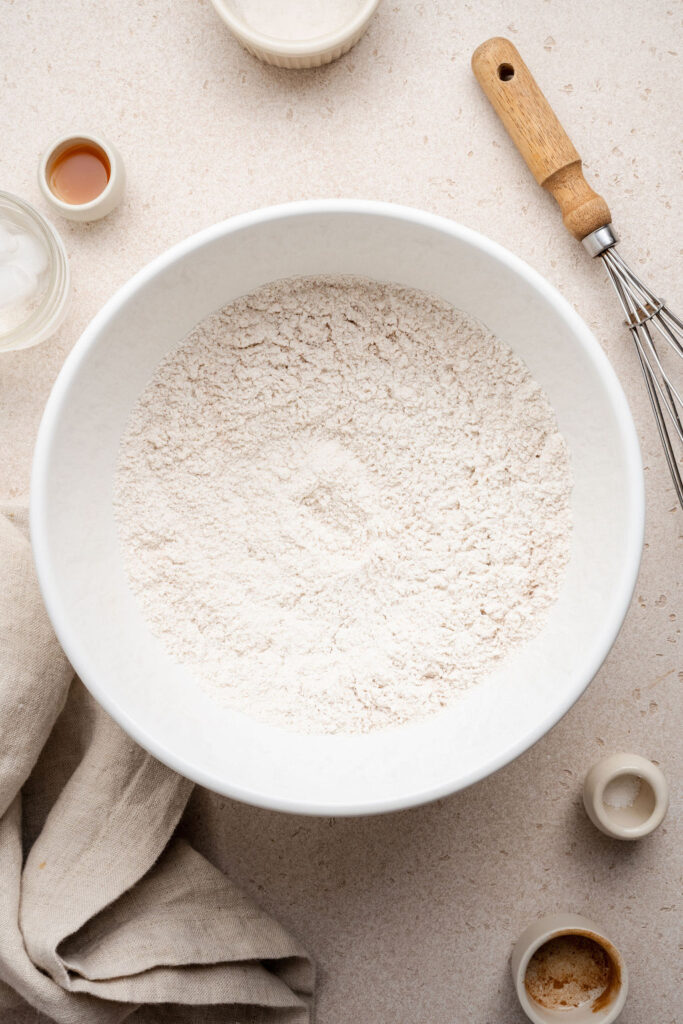
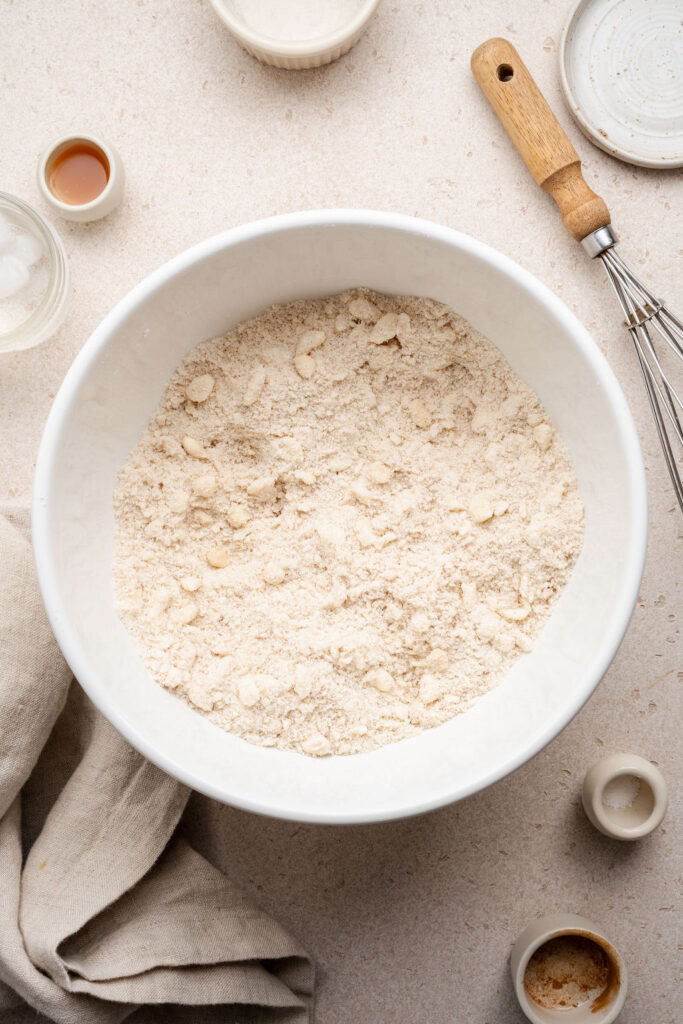
Step 1: Whisk together the gluten-free 1:1 flour, sugar, cinnamon, and salt.
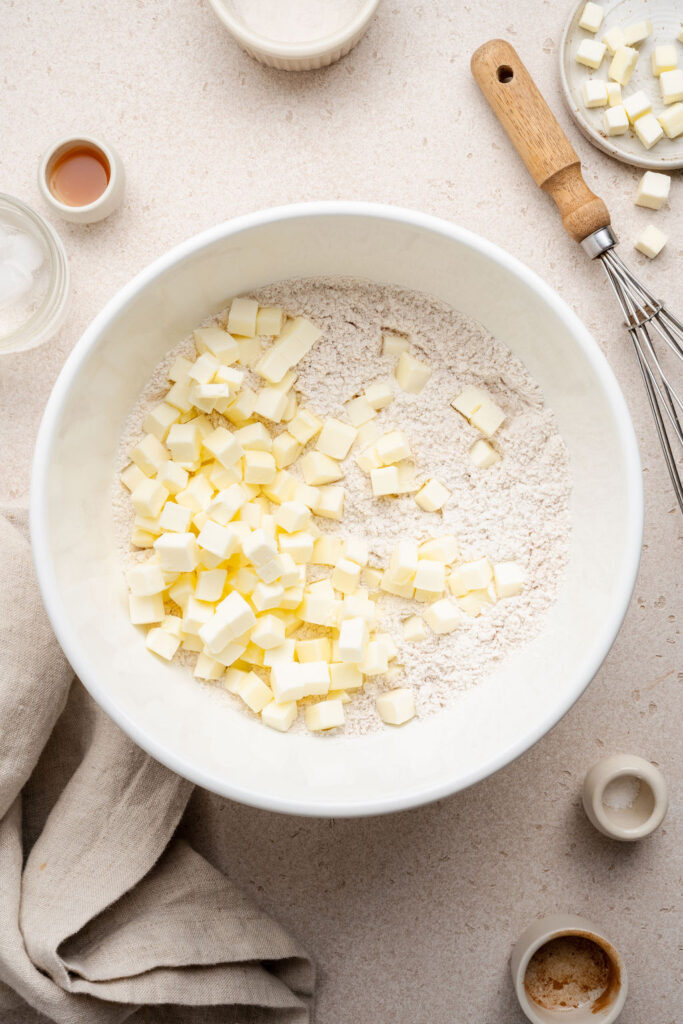
Step 2: Add the cold cubed butter and use a pastry blender or your fingers to work the butter into the dry ingredients until the butter is pea-sized or slightly larger.
Step 3: Mix 6 tbsp of ice cold water with 1 tsp of apple cider vinegar. Drizzle the water/vinegar over the mixture 1 tbsp at a time, stirring with a rubber spatula after each addition until the dough begins to stick together and form large clumps.

Step 4: Pour the dough onto a clean work surface and press the dough together to form a ball. Cut the dough in half, form each half into a disk, and wrap in plastic wrap. Refrigerate the dough for 2 hours.

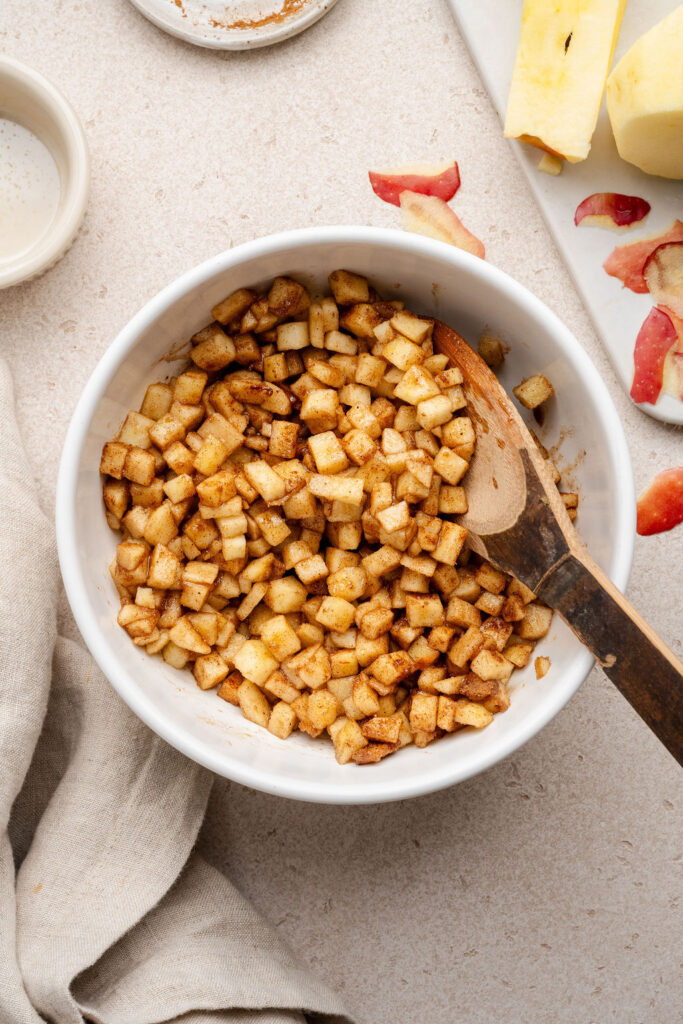
Step 5: Peel and dice the apples into 1/2 inch (or slightly smaller) chunks. Toss the apples with the light brown sugar, cinnamon, allspice, nutmeg, and salt.
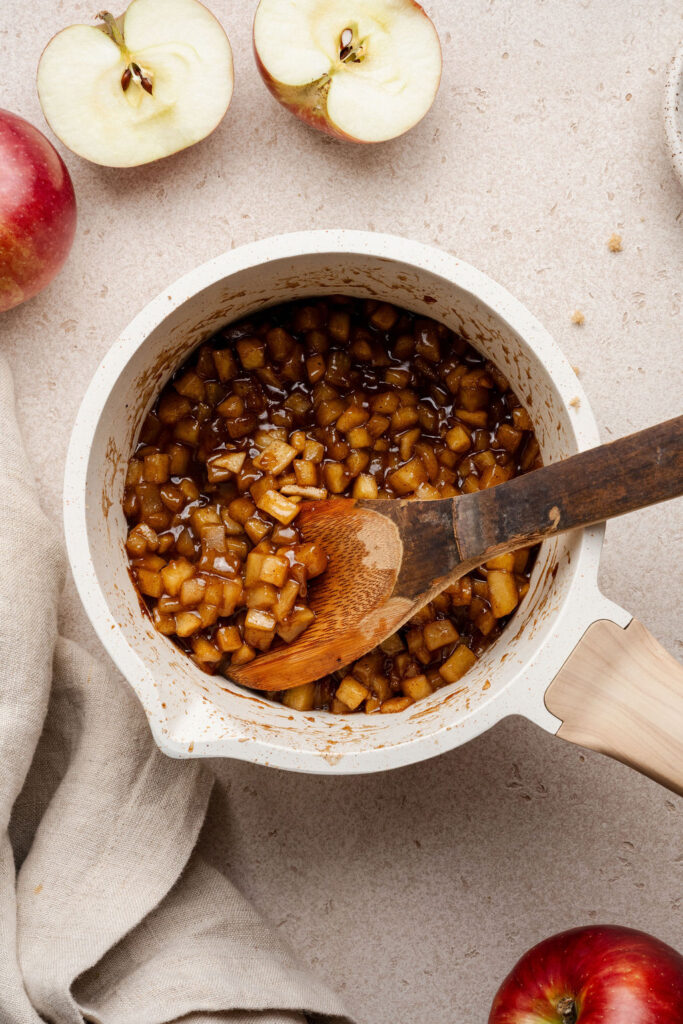
Step 6: Melt the butter in a saucepan and stir in the apple mixture. Heat the mixture until the juices begin to simmer. Allow the apples to simmer in the juices for about 5-7 minutes until they begin to soften, stirring occasionally. Then add the cornstarch slurry and stir until the juices thicken. Set aside to cool.
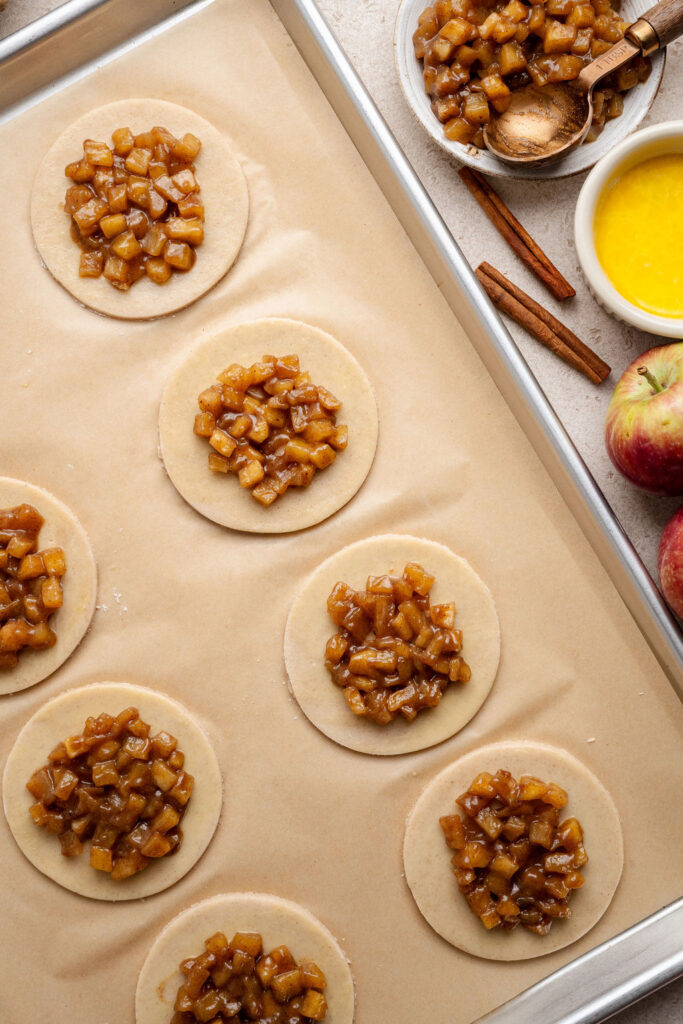
Step 7: Remove one disk of dough from the refrigerator and roll out to ⅛-¼ inch thickness on a lightly floured work surface. Use a 3 ½-4 inch round cookie cutter to cut out eight circles (these will be the bottom crusts).

Step 8: Place the bottom crusts on a parchment lined baking sheet, brush with egg wash, and place a heaping tablespoon of the filling in the center of each crust.
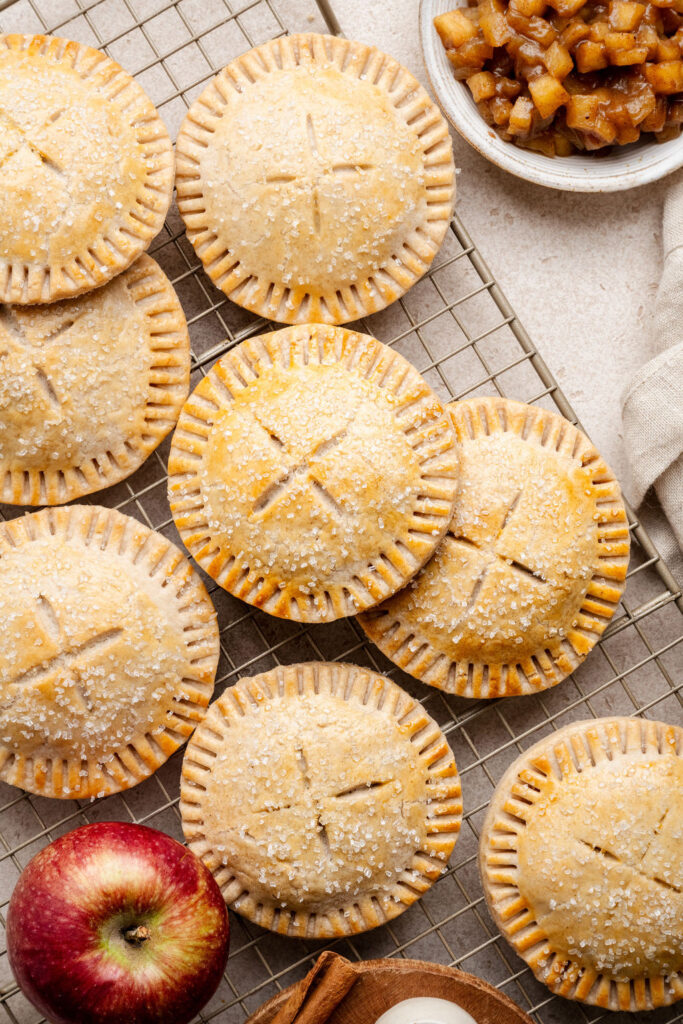
Step 9: Repeat the rolling out/cutting out process with the second disk of dough to get another eight circles (these will be the top crusts). Place the top crusts on top of the filled bottom crusts and press around the edges to seal. Then crimp the edges with the tines of a fork and cut slits in the center with a sharp knife to vent. Brush with egg wash and sprinkle with coarse sugar.
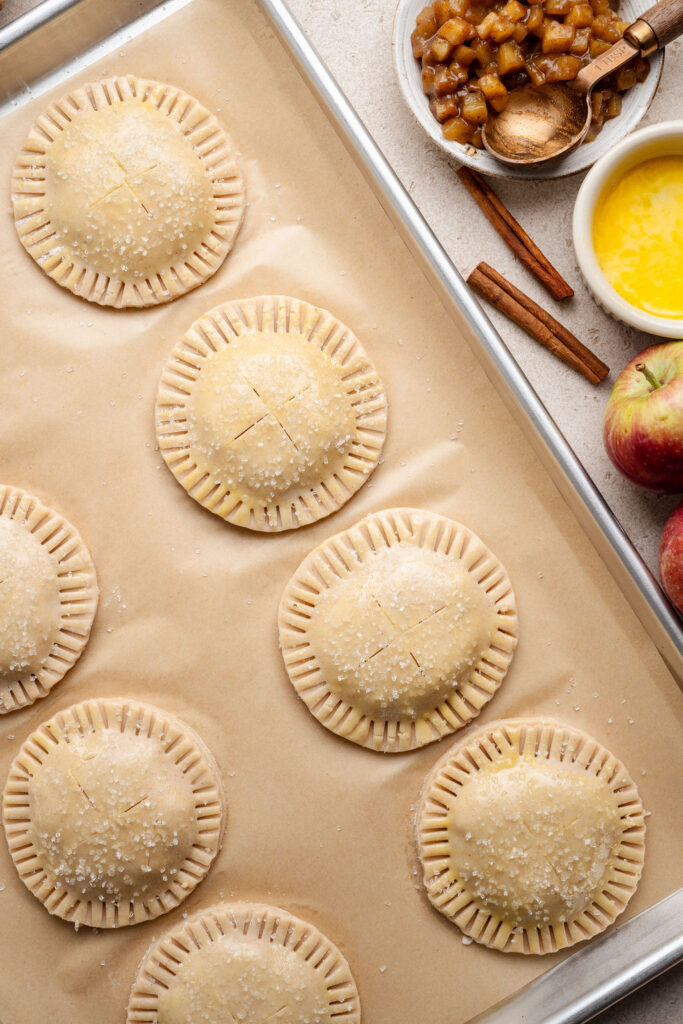
Step 10: Bake at 375°F for 18-22 minutes. Remove from the oven and allow the pies to cool on the pan for 5 minutes and then transfer to a wire rack. Enjoy the hand pies warm or at room temperature!

Recipe Tips
Keep the butter extra cold
Cold butter creates steam pockets as the pies bake, giving you a beautifully flaky, layered crust.
Chill the dough long enough
A full rest allows the flour to hydrate and the butter to firm back up, making the dough easier to roll and less likely to crack.
Flour the surface generously when rolling out the dough
Gluten-free dough tends to be a little stickier. Lightly flour your work surface, rolling pin, and the top of the dough to prevent sticking and tearing.
Roll to an even thickness
Aim for ⅛–¼ inch so all your hand pies bake consistently with crisp edges and tender centers.
Don’t overfill the pies
A heaping tablespoon of filling is just right. Too much can cause the juices to seep out as they bake.
Seal the edges well
Use your fingertips first, then crimp with a floured fork to keep the filling contained and create that classic hand-pie look.
Vent the top crust
Cutting small slits in the top crust allows steam to escape, preventing the tops from bursting or doming in the oven.
Watch for a deep golden color
The pies are ready when the crust is evenly golden and crisp—this ensures the centers are fully set and the bottoms are sturdy.
Let them cool briefly
A short rest on the pan helps the crust firm up while the filling settles into a jammy, warm center.

Storage & Reheating Instructions
Room Temperature:
Store in an airtight container at room temperature for 1–2 days.
Refrigerator:
Keep up to 4 days in the refrigerator. Reheat before serving for the best texture.
Reheating:
Warm in a 300°F oven for 10–12 minutes to re-crisp the crust.
Freezing:
Freeze fully baked pies for up to 2 months. Reheat at 325°F for 15–18 minutes.

Gluten-Free Apple Hand Pies
- Total Time: 3 hours
- Yield: 8 Hand Pies
- Diet: Gluten Free
Description
These Gluten-Free Apple Hand Pies feature a buttery, flaky crust and a warm cinnamon-spiced apple filling. A cozy, handheld dessert that’s perfect for seasonal gatherings, holidays, or everyday baking.
Ingredients
PASTRY
2 1/4 c (330g) gluten free 1:1 flour
1/4 c (50g) granulated sugar
1 tsp ground cinnamon
1 tsp fine kosher salt
1 c (226g) unsalted butter, cold
5–6 tbsp ice cold water
1 tsp apple cider vinegar
FILLING
2 1/2 c (300g) apples, peeled and diced
1/3 c (70g) light brown sugar, lightly packed
1 tsp ground cinnamon
1/4 tsp ground allspice
1/4 tsp ground nutmeg
pinch of salt
2 tbsp (28g) unsalted butter
1 1/2 tsp cornstarch mixed with 1 tbsp water
egg wash: 1 large egg + 1 tbsp milk
coarse sugar for sprinkling on top
EQUIPMENT
Rolling pin
3 1⁄2-4 inch round cookie cutter or biscuit cutter
Instructions
PREPARE THE PASTRY DOUGH
- Place the cold butter in the freezer for 5-10 minutes before beginning to make sure it is extra cold.
- Add the 1:1 flour, granulated sugar, cinnamon, and salt to a large mixing bowl and whisk to combine.
- Cut the cold butter into small cubes and sprinkle over the dry ingredients. Using a pastry blender or your fingers, work the butter into the dry ingredients until the butter becomes pea- sized or slightly larger.
- Mix 6 tbsp of ice cold water with 1 tsp of apple cider vinegar. Drizzle the water/vinegar over the mixture 1 tbsp at a time, stirring with a rubber spatula after each addition until the dough begins to stick together and form large clumps. Do not add more water than needed (~5-6 tbsp is generally good but add more or less as needed). The dough should stick together when pressed but not be overly wet or sticky.
- Pour the dough onto a clean work surface and press the dough together to form a ball.
- Cut the dough in half, form each half into a disk, and wrap in plastic wrap.
- Refrigerate the dough for 2 hours.
MAKE THE FILLING
- Peel and dice the apples into 1/2 inch (or slightly smaller) chunks.
- Toss the apples with the light brown sugar, cinnamon, allspice, nutmeg, and salt.
- Melt the butter in a saucepan or skillet over medium heat.
- Add the apple mixture to the pan and stir together with the butter.
- Heat the mixture until the juices begin to simmer. Allow the apples to simmer in the juices for about 5-7 minutes until they begin to soften, stirring occasionally.
- Stir together the cornstarch and water to make a slurry and pour over the apples in the pan.
- Continue to stir the mixture until the juices begin to thicken (~1 minute).
- Remove from the heat and allow the apples to cool to room temperature before assembling the pies.
ASSEMBLE AND BAKE THE HAND PIES
- Preheat the oven to 375°F and line a large baking sheet with parchment paper. Set aside.
- Remove one disk of dough from the refrigerator and place on a lightly floured work surface. NOTE: If the dough has been chilling for more than two hours you can set both out at room temperature until they are soft enough to roll out.
- Flour the surface of the dough and roll the dough out to 1/8-1/4 inch thickness. Rotate the dough periodically to prevent sticking, adding more flour as needed.
- Use a 3 1/2-4 inch round cookie/biscuit cutter to cut out 8 circles. The dough can be re-rolled if needed. Place each circle of dough on the prepared baking sheet (these will be the bottom crusts of the pies).
- Whisk together the egg and milk for the egg wash and lightly brush over the surface of each circle.
- Place a heaping tablespoon of the apple filling in the center of each circle and spread/flatten the apples with the back of spoon, leaving a small border around the edge.
- Roll out the second disk of dough and cut out another 8 circles (these will be the tops of the hand pies).
- Place each circle on top of the filled bottom crusts. It’s helpful to stretch the top crust slightly so it fits over the apple filling.
- Using your fingers, press around the edge of the crusts to seal them together around the filling. Then dip a fork in flour and press the tines of the fork around the entire edge to further seal the top and bottom crusts together.
- Use a sharp knife to cut four slits in the center of each top crust.
- Brush the top of each hand pie with the egg wash and sprinkle with coarse sugar.
- Bake on the center rack of the oven for 18-22 minutes or until the pies are golden brown.
- Remove from the oven and allow to cool for five minutes on the pan. Then transfer to a wire rack.
- Enjoy the hand pies warm or at room temperature. Serve with a scoop of vanilla ice cream if desired. Enjoy!
- Prep Time: 40 minutes
- Chill Time: 2 hours
- Cook Time: 20 minutes
- Category: Pastries
Photography by Creating Kaitlin


Leave a Reply