Description
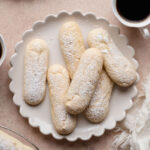
These homemade gluten-free ladyfingers (savoiardi) are light, airy Italian sponge cookies with a delicate sweetness and a lightly crisp exterior. Made with simple ingredients, they’re perfect for tiramisu, trifles, and other layered desserts!
Ingredients
4 large eggs, separated, at room temperature
2/3 cup (135g) granulated sugar, divided
1/8 teaspoon cream of tartar
1 teaspoon pure vanilla extract
1 1/4 cups (185g) gluten-free 1:1 flour
2 tablespoons cornstarch
1/4 teaspoon fine sea salt
Powdered sugar, for dusting
Instructions
PREPARE THE BAKING SHEETS
- Preheat the oven to 350°F (177°C). Line two large baking sheets with parchment paper. Fit a large piping bag with a 1⁄2-inch round piping tip (or a similarly sized round tip) and set aside. OPTIONAL: For evenly sized ladyfingers, use a pencil to draw guidelines approximately 31⁄4–31⁄2 inches long on the parchment paper. Flip the parchment over before placing it on the baking sheet so the markings are on the underside.
PREPARE THE EGG MIXTURES
- In a medium mixing bowl, whisk together the egg yolks and half of the granulated sugar (1/3 c/approximately 67g) for 2-3 minutes until the mixture is pale, thick, and creamy. Add the vanilla extract and whisk until combined.
- In the bowl of a stand mixer fitted with the whisk attachment, beat the egg whites on medium speed until foamy. Add the cream of tartar and mix to combine.
- With the mixer running, gradually add the remaining 1/3 cup granulated sugar, about 1 tablespoon at a time. Wait 20 seconds between each addition.
- Increase the speed to medium-high and continue beating until stiff, glossy peaks form. The peaks should hold their shape when the whisk is lifted, without appearing dry or grainy.
PREPARE THE LADYFINGER BATTER
- Gently fold approximately one-third of the whipped egg whites into the yolk mixture using a rubber spatula to lighten it. Add the remaining egg whites in two additions, folding gently until mostly incorporated.
- In a separate bowl, whisk together the gluten-free flour, cornstarch, and salt. Sift one-third of the dry ingredients over the egg mixture and gently fold until almost incorporated. Repeat with the remaining dry ingredients in two more additions, folding just until no visible streaks of flour remain. Avoid overmixing or deflating the batter.
PIPE AND BAKE THE LADYFINGERS
- Transfer the batter to the prepared piping bag. Pipe strips approximately 31⁄4–31⁄2 inches long and 1⁄2–3⁄4 inch wide onto the prepared baking sheets, leaving approximately 1 inch between each ladyfinger to allow for expansion during baking.
- Using a fine-mesh sieve, generously dust the ladyfingers with powdered sugar. Allow them to sit for approximately 2 minutes, then dust them a second time right before placing them in the oven.
- Bake for approximately 12–15 minutes, or until the ladyfingers are lightly golden, puffed, and dry to the touch. Allow them to cool on the baking sheets for 10 minutes before transferring them to a wire rack to cool completely.
Store the ladyfingers in an airtight container for up to 3 days.
- Prep Time: 25 minutes
- Cook Time: 12 minutes
- Category: Dessert
- Method: Baking